Tie-Dyeing
The history of Arimatsu, a town known as the center of shibori or tie-dyeing, dates back to 1608, when Takeda Shokuro and other pioneers of shibori started the business. That was several years after Shogun Tokugawa Ieyasu took the reins of government in Edo.
The 400-year-success of Arimatsu Shibori began when the lord of Owari decided to protect the industry as the region's special product and gave credit to Takeda Shokuro.
Then tourists began to buy tie-dyed products, such as tie-dyeing hand towels and bathrobes, as souveniors to their home town, and eventually these products began to be known as one of themost famous items of the area.Thethriving business of the town in those days was often depicted in various ukiyoe prints by Katsushika Hokusai and Ando Hiroshige. The prints introduced the site as Narumi, a bigger town next to Arimatsu, but actually that was Arimatsu and the products were labeled as “Arimatsu Shibori".
The city-scape, which still keeps traditional beauty of Japanese architecture and old-time prosperity is now valued as the cultural heritage. Thewhole area was nominated by Nagoya Municipal Office as the first“Town-Street-To- Be-Preserved". And it became to be known as the birth place of the nation-wide Organization of Historical Town Preservation.
- Pattern Design
- Pattern Engraving
-
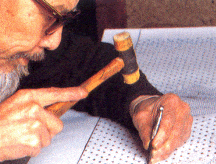 After designing, patterns are cut out on sheets of paper by sharp knives and chisels.
- Pattern Print
-
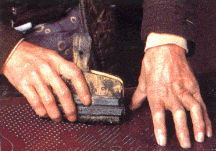 The pattern is duplicated on the cloth by a brush and blue ink. The blue ink is produced out of the juice taken from cultured flowers (tsuyukusa), which soaked into washi (Japanese paper ) and dried, and in use, again drained in water.
- Tie-Dyeing Work
-
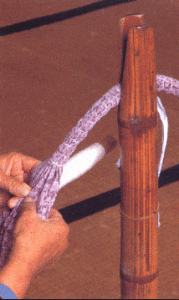 Items on which patterns are printed are handed out to several households for tying. This tying process usually takes four to ten months. Techniques and tools to be used vary according to the types of tying. The photos show the process of stripe-tie-dyeing. Among the tools used for tie-dyeing are “karasu-guchi-dai",“kanoko-dai",“kunoji-kagibari",and “makiage-dai."
- Dyeing
-
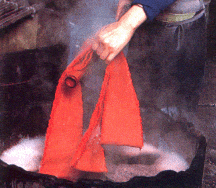 Tied items are dyed at factories which specialize in tie-dyeing. Most of the tied materials are dyed by soaking but some need special techniques. Dyeing liquid is made from carefully chosen dyestuff and catalyst. Dye-stuff and dyeing proceed ures also vary according to the types of the products and the quantity of the material to be dyed.
- Take Out Stitchies
-
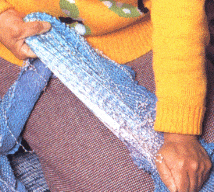 In tie-dyeing, patterns are made by tying the cloth with string, which
mean sit must be tied very tight and strong so that tied parts escape penetration of dye. So untying the strings also requires techniques. It must be done quickly and carefully not to hurt the cloth. Untying procedures are again different according to the types of design. Some types need three to four days to remove all the strings on one scroll of cloth. ( One scroll is good for one kimono.)
- Finish
-
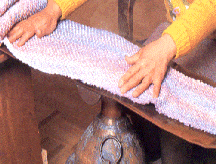 There are two types. One is rolled up to make scrolls. The other is to bearranged into kimono to show the whole picture when completed. This is called “ebashiage."
Type of Tie-Dyeing
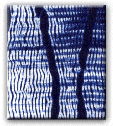
Mokumenui
Stitch the line printed on the cloth at regular intervals and gather tightly. Irregular folds create wood grain effect.
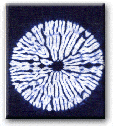
Karamatsunui
Concentric half-circles are marked on the cloth at the fold.The units are in staggered row. A continuous thread is used to stitch eadn row of half-circles. Running stitches are made through the two layers of the cloth in the fold. When all the stitches are completed, the threads are drawn up tight and knotted.
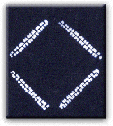
Orinui
This technique is also called "Tsumami-nui" or "Yama-nui''. Fold the cloth on the line of the pattern and run stitches along the fold, pull the thread tightly.
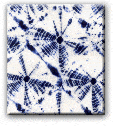
Tegumo
A metal hook attached by a cord to the upright of a tying stand is used to hold the cloth taut. The cloth is caught on the hook and drawn into folds. The thread is bound from the base of the unit, where the folds are gathered together, to the top near the hook.
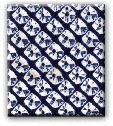
Kikaigumo
In this method the electric tool is used to hold the cloth taut and to bind the cloth. This technique is more efficient and creates finer patterns than Tegumo Shibori.
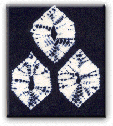
Makiage
Hook the thread on the wishbone shaped wire loop of a tying stand after stitching along the printed outlines with running stitches. The thread is drawn tight by using a wooden dowel. A single knot secures the thread and it is cut.
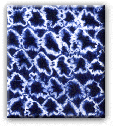
Yokomiura
This technique uses the tool where the metal hook hangs by a cord from the upright of the tying stand. The cloth is pushed up from underneath by the left index finger. A loop of thread is made around the portion of the cloth to be bound. The right hand moves the hook to catch the center of the cloth with in this looped knots are laid horizontally.
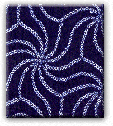
Hitomekanoko
Put the cloth on the hook. Units are finer than those. Bind the cloth on weft and crate motifs of flower and birds. This technique is called “Tatebiki Shibori”, or “Tsumekanoko” or “Itako Shibori”.
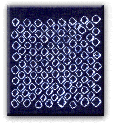
Tsukidashikanoko
The cloth is held down over the needle and wind around twice over a small bit of cloth. One or two “Kamosage” knots are used.
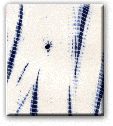
Kumoiriyanagi
First small “Kumo Shibori” are tied then the cloth is pleated lengthwise while the folds are diverted around each Kumo. Preliminary thread is wound around the pleated cloth. Afterwards, a whole rope-like cloth is attached to a device which rotates it. Very tight fine binding thred is applied every 4 mm.
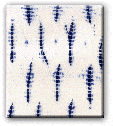
Midori
A variation of pleating proccess. A preliminary thread is applied to keep the folds in place. Every 4 to 5 cm the pleats are reversed-peak and valley creating staggered broken vertical lines.
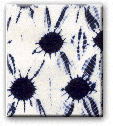
Hinode
Running stitch is applied on continuous half circles on a fold and the thread is gathered. Preliminary binding is applied between the stitched rows, the long rope-line cloth. Finally a resist thread is wound tightly.